How to configure the AX.25 TNC by UZ7HO for use with Winlink Express
Configuring UZ7HO’s Soundmodem is fairly straightforward on Windows. If you have previously downloaded VARA FM and successfully configured it with Winlink Express, then you’ll find the setup for UZ7HO’s Soundmodem very similar.
In a nutshell, the process works like this:
- Download the Soundmodem program
- Download the CAT/PTT DLL’s (if you need PTT via computer; not needed if you use a Signalink)
- Extract all zip file contents to a common folder
- Launch and configure Soundmodem
- Launch and configure a “packet winlink” session within Winlink Express
- Send/Receive Winlink messages via Packet
Download Software
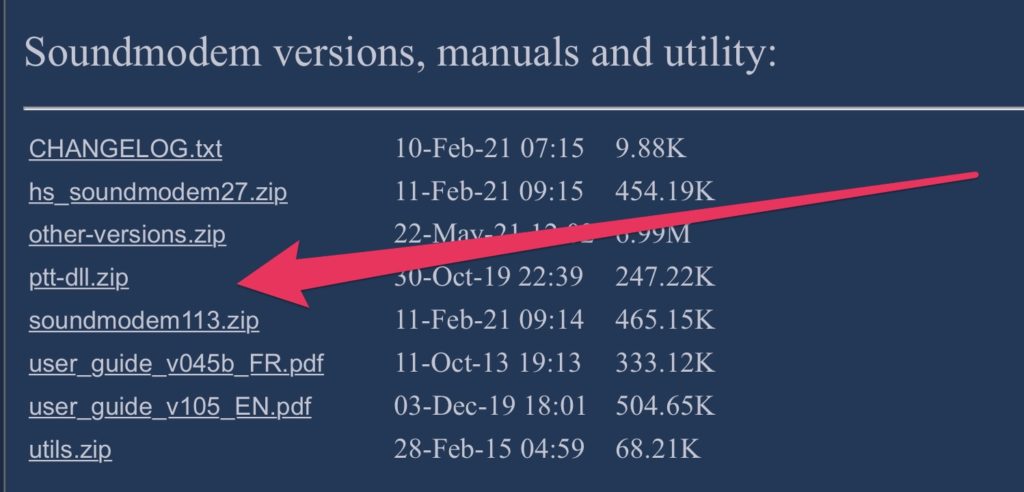
First, download Soundmodem from UZ7HO‘s website. It’s the link named “soundmodem113.zip” (as of Jan. 2022) about two-thirds of the way down on the page. If you trigger your radio’s PTT function via your computer (unlike a Signalink that uses VOX between it and your radio), then you’ll also want to download “ptt-dll.zip” on the same page.
Extract files to same folder
The Soundmodem program is a self-contained “.exe” file. So there’s nothing to “install”, after the file has been extracted, all you have to do is double-click on the “soundmodem.exe” file to launch the AX.25 TNC. I created a folder directly on my C:\ drive named “UZ7HO” to hold the extracted files.
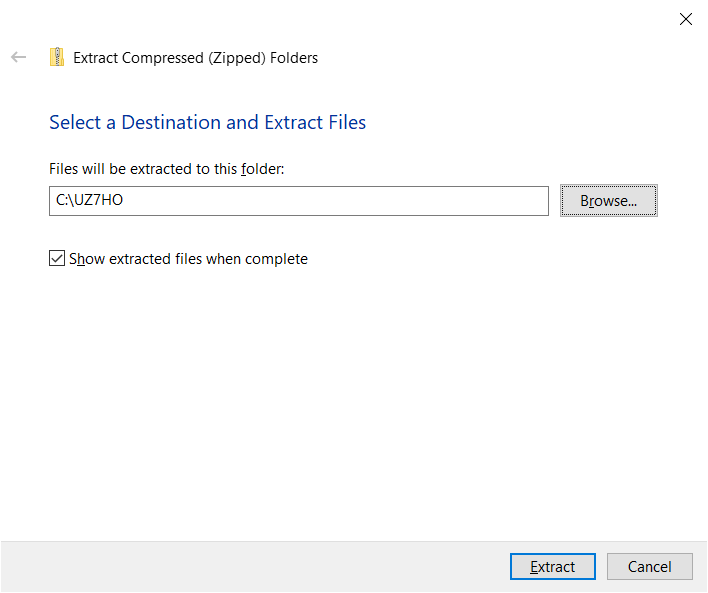
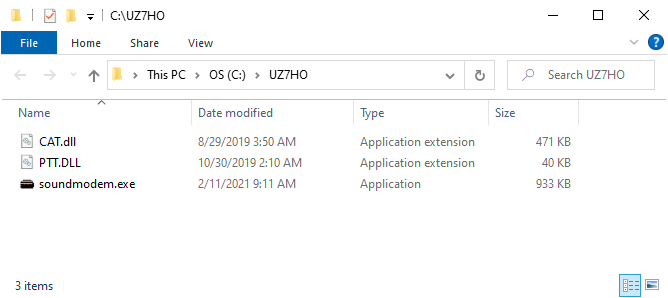
The first time you execute “soundmodem.exe”, Windows will probably complain that it doesn’t recognize the program’s author and will display a warning. You can chose the “open anyway” option and then you won’t get that message again upon subsequent use of the program.
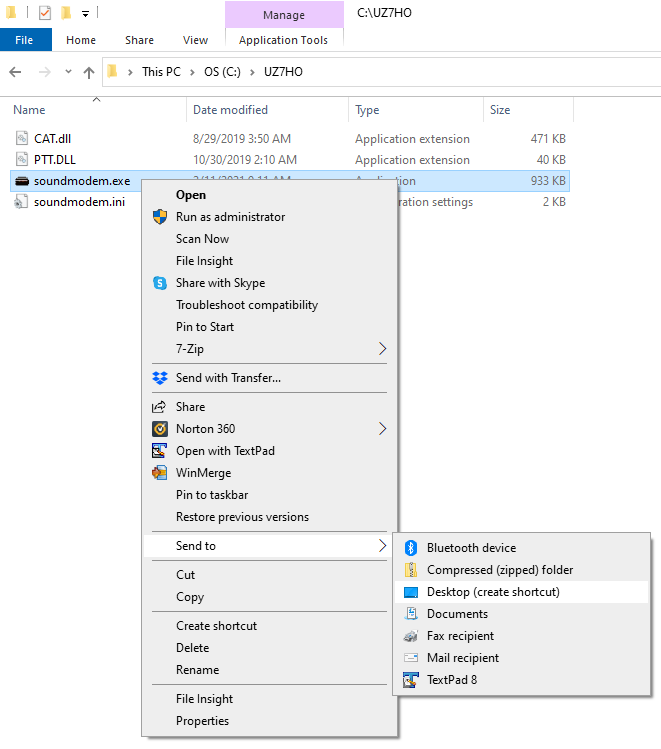
After the program is in your desired folder, you might want to create a shortcut to it on your desktop. I renamed my shortcut after I created it so I’d remember exactly what it is.
Configure Soundmodem
Configuring Soundmodem consists of two parts:
- Settings for Devices (the soundcard and, optionally, PTT settings)
- Settings for Modem (packet settings for how Soundmodem should behave)
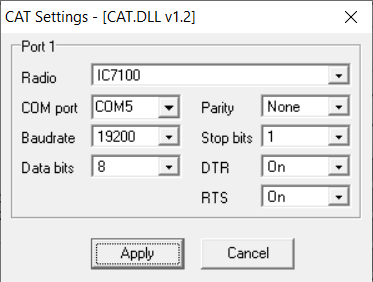
Launch Soundmodem and choose “Settings -> Devices”. Pick your soundcard input and output devices. Ensure the “KISS Server Port” is set to 8100 and the “Enabled” checkbox is checked. If you need CAT for PTT (IC-9700, IC-7100, FT-991A, etc), then choose “CAT” for the PTT Port. That should activate the “Advanced PTT settings”. In the “Advanced” window, pick your radio and the appropriate COM port, baudrate, etc for how your PC talks to your radio.
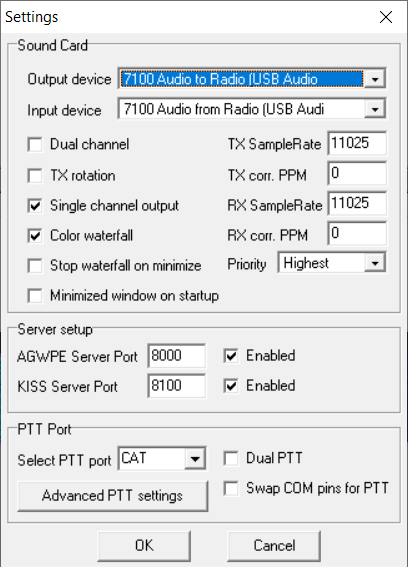
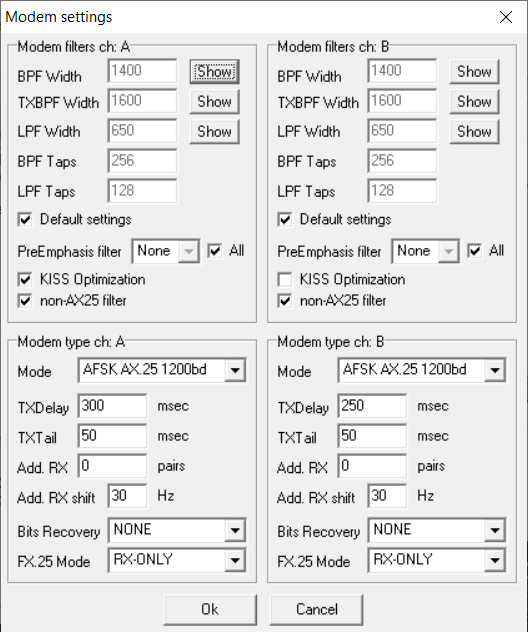
After you’ve configured ‘Devices’ return to the main Soundmodem window and choose “Settings -> Modems”. There are two modem channels within Soundmodem, we’re only concerned with configuring “ch: A”. Change the settings to match the below screenshot:
Configure a Packet Winlink Session
After you’re finished configuring UZ7HO’s Soundmodem, close it and launch Winlink Express. Choose “Packet Winlink” and then click “Open Session:” next to the drop down

After the “Packet Winlink Session” window has opened, click on the “Settings” menu. Change the settings as needed to match the screenshot below. If you want Winlink Express to launch Soundmodem automatically, then browse for the location of the “soundmodem.exe” file and check the box.
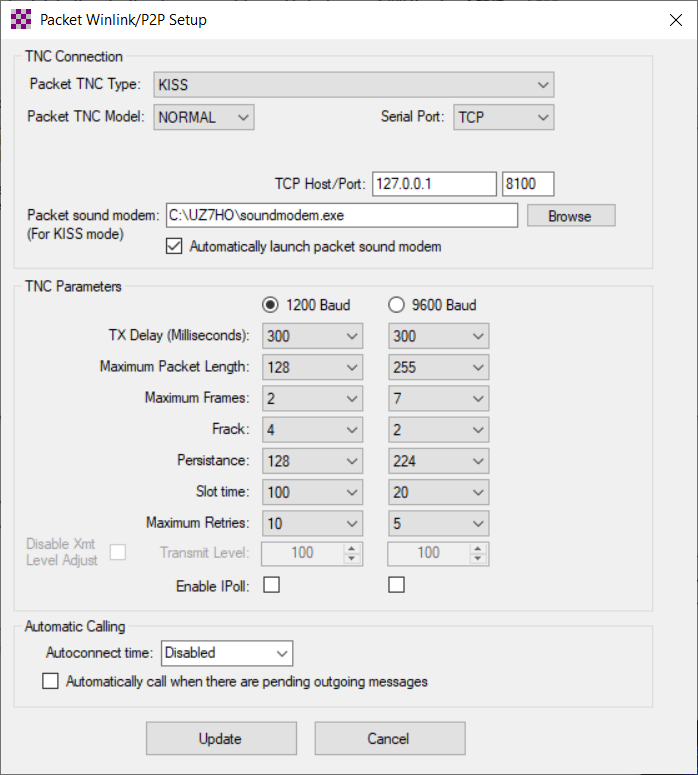
Click the “Update” button. The “Packet Winlink Session” window should refresh and you should see a message that looks something like this:
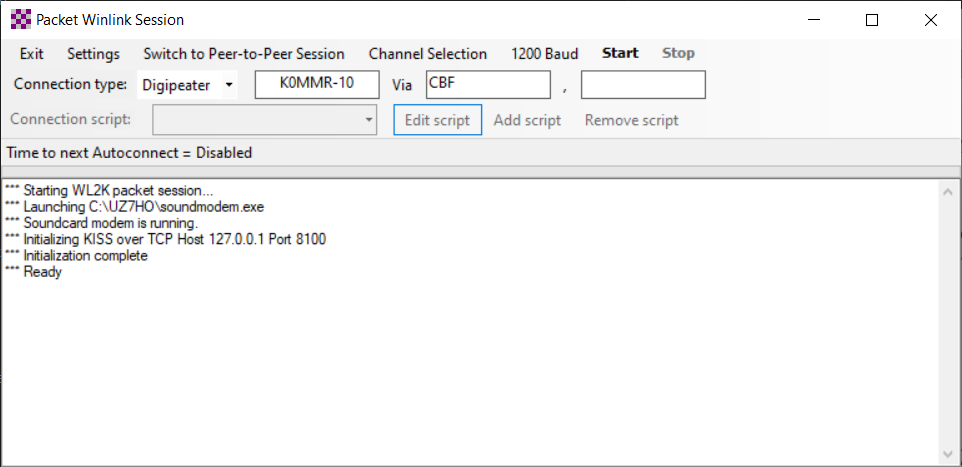
Now choose your desired connection type, RMS station, Via station, etc and you’re ready to go!!
Frequencies, Local RMS stations, Other Resources, etc…
In the Omaha area, packet radio uses 145.09MHz.
There are 2 local area RMS stations that accept packet sessions; K0MMR-10 and KD0IVV-10. If you have trouble hitting those stations directly, try using a “via” station (see screenshot above). Pretty much any other packet station can act as a digipeater. However, CBF is located on a high hill in Council Bluffs and is my “go to” packet digipeater.
Marty, W0ZZK, alerted me to some other resources for how to setup/configure UZ7HO (and other transports) with Winlink Express: